Leaderboard


Popular Content
Showing content with the highest reputation on 02/19/2017 in all areas
-

Archibald Russell
lcrcar and 3 others reacted to Alex Bellinger for a topic
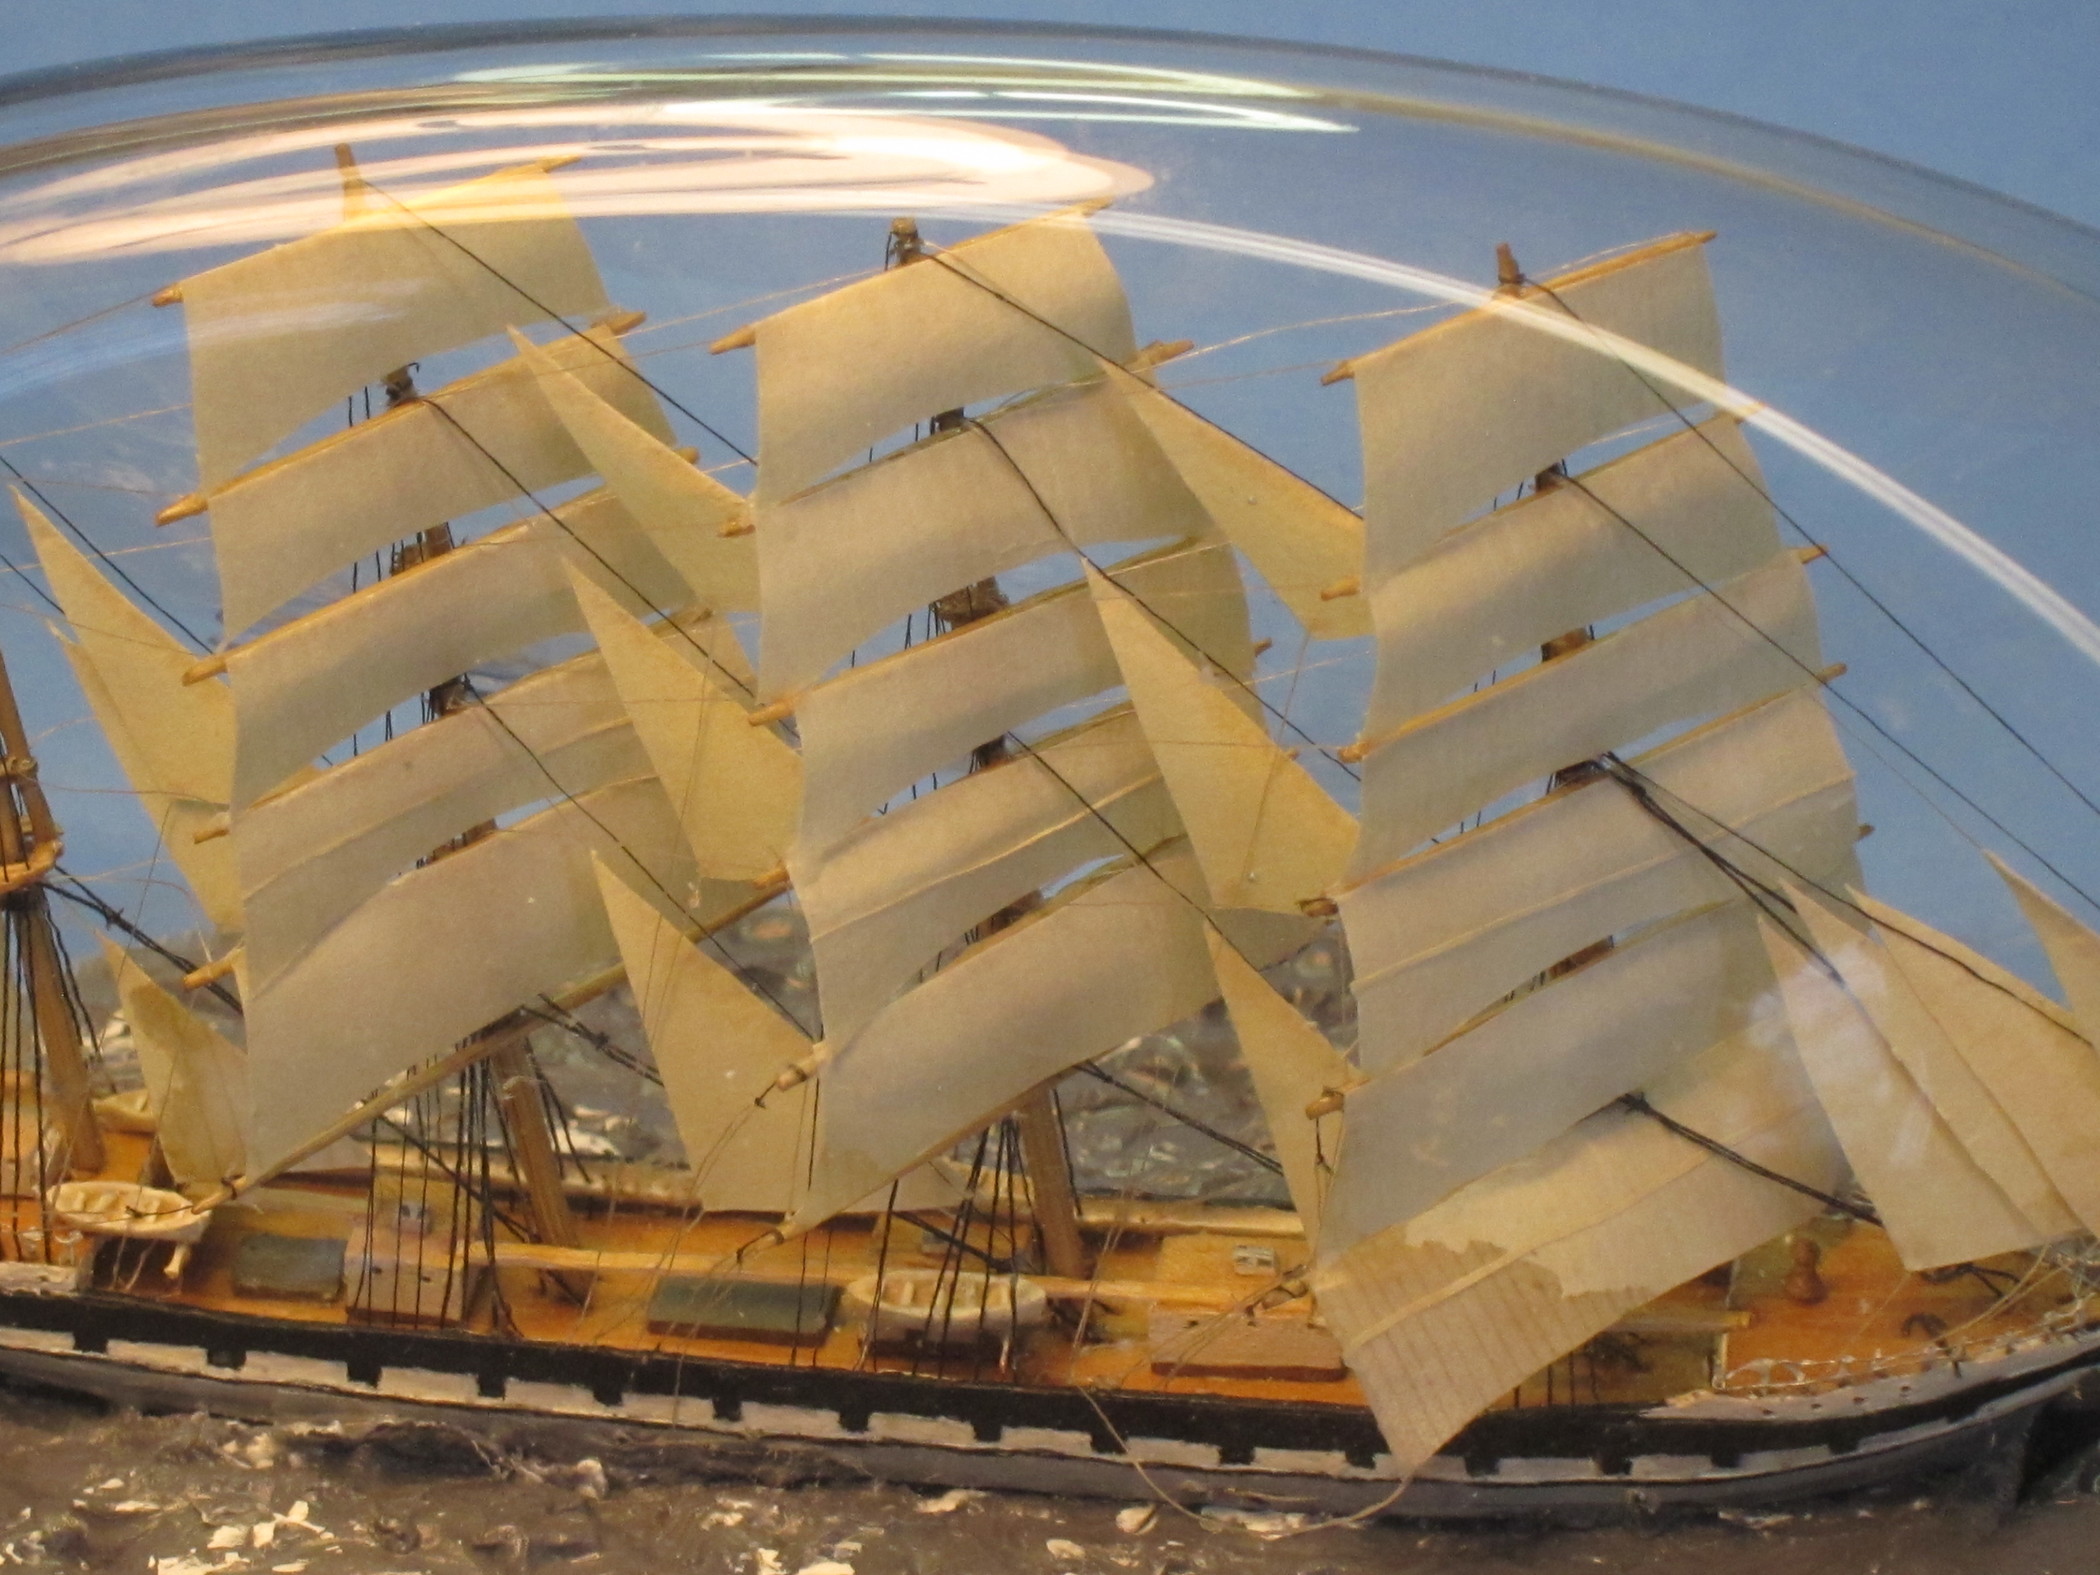
Finally the square sails could be added. The material for the sails is much like what I have been using for years, a light weight paper colored with a warm gray magic marker. Instead of using the point of a pin to scribe the seams or “clothes” of the sails I returned to an older idea and used a hard pencil. Seams made with the pin tend to crack and split, and at this scale that could be quite a problem. In spite of using a #9 pencil, the seams, only on the weather side, look a little too heavy to me. The final details are the boats and anchors, and I almost always put these off until the last. Good miniature boats can be nicely made of paper but I’ve had no success with that technique at this scale. There are carved out of pine and have paper thwarts. Like the catwalk railing, these details may be more a challenge at this scale than they are really worth. But not having them no would look worse, I think, so the attempt is always made. The bottle that renewed my interest in this project is a hand blown bottle by Michael Magyar from Cape Cod. It is obviously intended to recall the classic pinch bottle, but happily is slightly longer and better accommodates a long ship like this bark. My friend and fellow ship bottler Gerry Ross knows Michael and sent one of these bottles as thanks for getting John Guley to complete a prototype of a kit Gerry was trying to develop John and I decided to give it to Charlie Ryan, another ship in bottler, but John got in touch with Michael about ordering more. After some back and forth we ordered 10 and split the order between us. For the first of my five I bottled the 5 mast two topsail schooner Carl Vinnen. The glass clarity is wonderful but the inside shape creates a couple of problems. The narrow corners inside are a little difficult to fill with putty and then get a smooth sea surface. It takes going back over a number of times. The corner on top, above the ship, is so narrow I was concerned whether the upper yards would have been braced around far enough for them to fit in this limited space. The indent on the side of bottle underneath the ship protrudes so far into the bottle the putty base above it is very shallow. But with the deep corners, the bottle takes a surprising amount of putty. But there was an unexpected bonus. Two air bubbles on the port side wound up acting as miniature magnifiers The bottling took about a week between getting her in and feeling all was well enough finished. Most of the difficulty was not having a secure enough bond with the putty sea, so that as I increased the tension on the stays, the model tended to head back towards the neck. I got over this by fashioning a section of coat hanger wire bent to hold the hull in place and taped to the outside of the bottle neck with duct tape. It is the first time I ever tried this, and I wonder if I’d recommend it. But in this case, it worked. The putty was put in the bottle months before. Because of the effects of oil staining sails, I have greatly increased the lead time between setting the putty in and finally bottling the ship. In spite of this lead time, the slight contact with the putty surface when bottling this ship immediately doused lower starboard sails with oil. This may eventually become lighter, but the effected area will always be more translucent than the rest of the sails. It may also spread, though I have rarely seen this with square rigged sails. I first encountered this problem years ago when the late George Pinter from Halifax, Mass, recommended I use plumber’s putty instead of the glazing putty I had been using. It took color well and was easy to shape into the bottle. Unfortunately, the heavy oil content of the plumber’s putty began to stain the sails like this. It also is supposed to never harden completely, and when the putty sea in a bottle I shipped to a gentleman in Texas became detached en route, that was it for me, and I returned to glazing putty. Sadly, this oil staining has returned in the past couple of years, and I need to solve this. Otherwise, this particular model was especially satisfying. We all have early dreams and visions that inspired us to take on this kind of work. For many of us, these are now many years old. This model does not succeed in many ways, and has a number of details that could have been, and should have been better. But it also succeeds enough in fulfilling early inspirations of mine to be encouraging, and give me hope there may well be similarly rewarding models in the future.


 4 points
 -

Steel barque Berwick Law
Bruce Foxworthy and 2 others reacted to Shipbuilder for a topic
Here is a very small model of the Berwick Law under full sail. This was built to the much smaller scale of 50 feet to 1 inch and only took about 24 hours to build, spread over a few days. I didn't bother with ratlines at all, but it is not really noticeable. The upper spars are a bit too thick, but an attractive model nevertheless! I know a lot of you work to much smaller scales than this, but 50 feet to 1 inch (1:600) is about my limit for miniatures. I have tried smaller scales, but without much success! Bob 3 points
 -

Scharnhorst 1/1800
Landlubber Mike and one other reacted to joe100 for a topic
Greetings, I recently finished the German battleship Scharnhorst 1943 in 1/1800 scale. Upper hull is 3d printed, lower hull and the rest of the details scratch built. The base is just temporary since the custom case was still on order. I will take some updated photos as she's now full mounted. Next up is a full hull ocean liner, NDL Europa, my favorite of the 30s greyhounds. Simultaneously I'm going to be working on the Japanese heavy cruiser IJN Maya. Maya will be 1/1800 scale and Europa around 1/2000.2 points -

neue Buddelschiffe
Landlubber Mike and one other reacted to Roger for a topic
Buddelschiff Ausflugschiffe in Ulm an der Donau Schiffswerft in Hamburg um 1870

.jpg.f101338ab46061cc91135352a4a80d07.jpg)
.jpg.993c4e6a3fc6cc2b58f160b4803fa414.jpg) 2 points
2 points -

Archibald Russell
Bernard Kelly reacted to DSiemens for a topic
Absolutely beautiful work. I wish I lived closer I'd take your advanced class in a heart beat. Regarding the oil on the sails there is one technique I've found and used which I find works well. In the old video of George Fulfits ship in bottle building he used saranwrap to cover the sea while putting the ship in the bottle. He also put some between the sails to keep the lines from snagging on the yards. The only trouble with it is you wouldn't be able to get the ship secured to the sea until the masts were erected. This is my preferred method any way so it works for me. Using your wire and duct tape idea would also work with the saranwrap method. Since the plastic is so thin it's easy to remove and protects the sails well.1 point -
I'm extremely impressed at the amount of detail you have at such a small scale. You're work is also very clean and sharp. What materials do you use?1 point
-
The details in this ship are incredible. Thank you for sharing the line coiling method. It's so rediculously simple but works so well.1 point
-
This is great. I'm working on a smaller clipper ship for a friend of mine and what you've written here is incredibly useful. To the point that I might redo his ship. All well. Live and learn.1 point
-
Das ist schön Roger danke für den Austausch.1 point
-
Continuation Artur


 1 point
 -
Alex, Very nice SIB and write up. I was interested in the meter probes you use to weight the rigging lines. I started doing similar a while ago, using a sort of colour code, red ones for port lines, green for stbd, black for stays, and so on. A bit of masking tape further identifies them. I also extended one for use as a 'grabber' for use 'in the bottle'. I'll post details elsewhere on the site. Thanks for sharing Alan1 point
-

MiniSIB - Typical boat of Mediterranean Sea, 1/200
Landlubber Mike reacted to IgorSky for a topic
Then me just was need to install the cork and this SIB has been completed

 1 point


.jpg.f101338ab46061cc91135352a4a80d07.jpg)
.jpg.993c4e6a3fc6cc2b58f160b4803fa414.jpg)


